rnagle
CDL Student Driver

Posts: 564
|
Post by rnagle on Feb 14, 2014 20:11:24 GMT -5
With one project completed and another well underway it seemed like an appropriate time to start a couple more, especially since they are trailers that will complete the rigs. First up is Kingsway 56406, a pup to go with the single drive Louisville. A good selection of 1:1 photos found on Hank's Truck Forum: 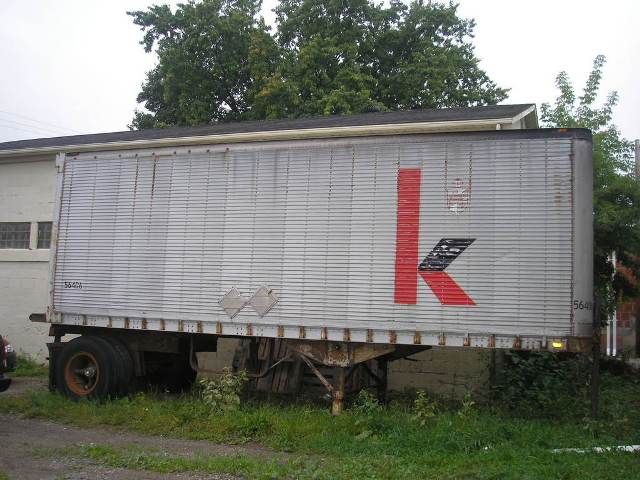 The "leftovers" part refers to a number of trailer kits I have raided for parts. The distinctively Canadian 72" tandem axle spacing seen on many trailers of that era (70's/80's) is fairly easy to model using parts supplied in AMT's van kits but requires 2 kits to make 1 tandem as extra suspension brackets are needed. So 40' beaded side van body parts were starting to multiply after I built a Labatt's beer trailer a while ago. I have also "stolen" 5 hole disk wheels from AMT's "doubles" trailer kit. Combining sides/ends from beaded side van with floor/roof/door from "doubles" pup seemed like a fairly easy way to build #56406 in miniature: 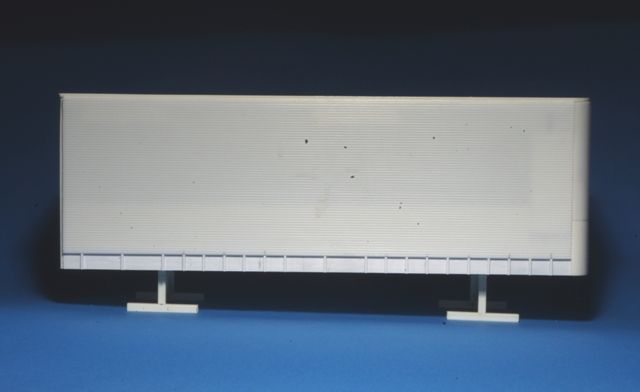 |
|
rnagle
CDL Student Driver
Posts: 564
|
Post by rnagle on Feb 14, 2014 20:21:14 GMT -5
Of course, it is never quite that simple....... Corrugations run full height on ends, having 2 end sections on hand meant cutting them to join in the "valley" of one of the corrugations and cementing together. Excess cut off as required to match height of sides. And then the corners had to be smoothed off as corrugations do not wrap around on 1:1. 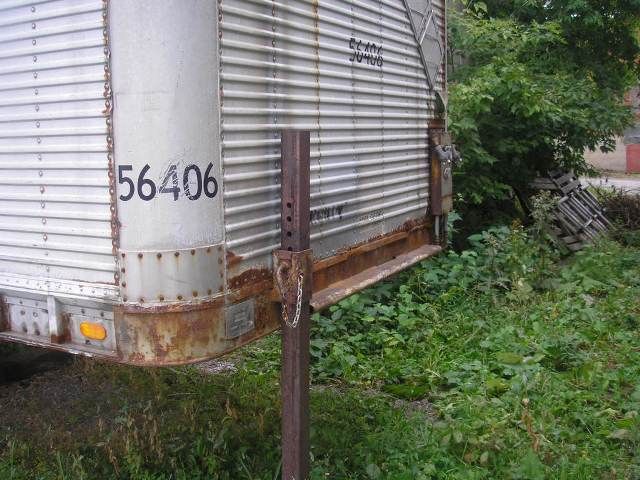 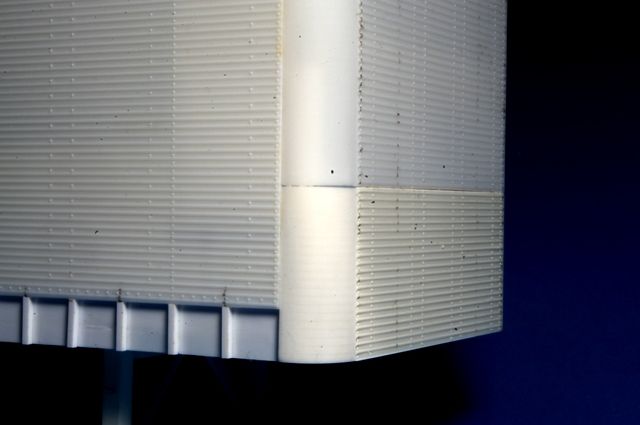 Width of ends compared to floor/roof is also different, doubles pup has narrower floor. Likely due to outside post design of that van body, in the end it worked out better anyway as bottom of #56406 sides have visible braces. Bottom of side cut off even with lowest corrugation, .020 stryene strip cemented along lapped on inside keeping overall height the same as stock kit sides. Area along edge of floor where molded in crossmembers stop short of edge filled in with styrene strip, then sides/nose attached to floor. .060 x .060 styyrene strip used for braces along bottom of sides: 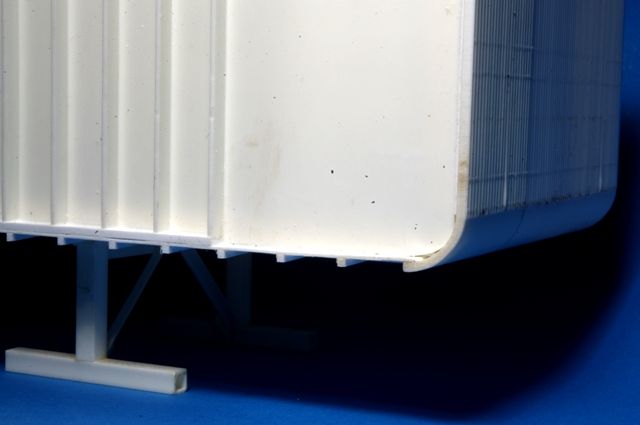 |
|
rnagle
CDL Student Driver
Posts: 564
|
Post by rnagle on Feb 14, 2014 20:32:28 GMT -5
Of course, if there are 2 beaded side end sections there must be 2 sets of sides.......just the ticket for replicating this Carling O'Keefe van! Was able to photograph a real one in Coboconk, Ontario, long parked for storage behind the Foodland/Beer Store in town. I took these pictures back in 2011 (!), was through town a few months back and it is still there. That 72" tandem spacing shows up well in side view: 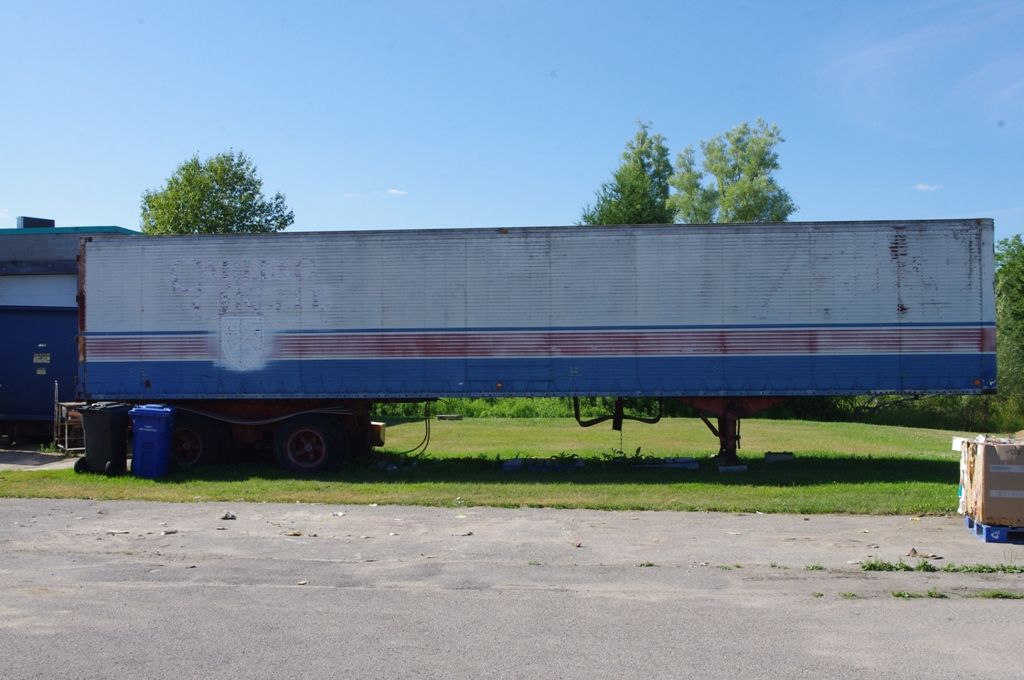 And the ends are not corrugated, in fact they sure look a lot like the "doubles" kit end! Except.......they are too narrow to fit beaded side van floor! Smooth face is easy to split down the centre and add a styrene strip though. Roof section has another layer of .060 styrene added. This will get wrapped with a narrow styrene strip to clean up laminated edge and then a .020 sheet will be fitted to top of roof to replicate fairly wide recessed area around roof edge where round marker lights are fitted on 1:1 trailer: 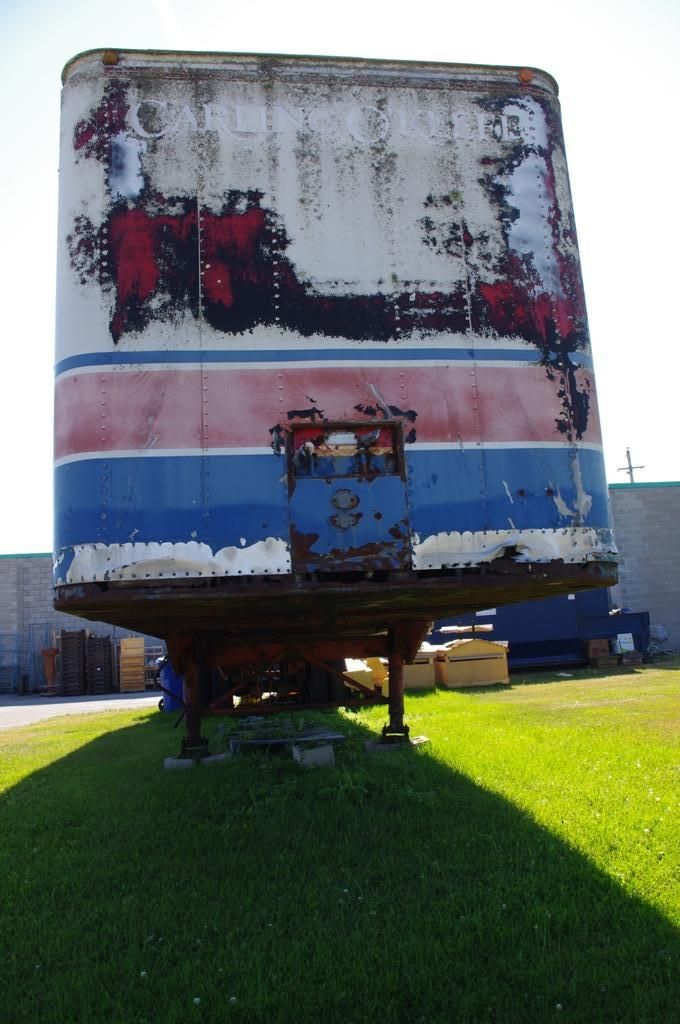 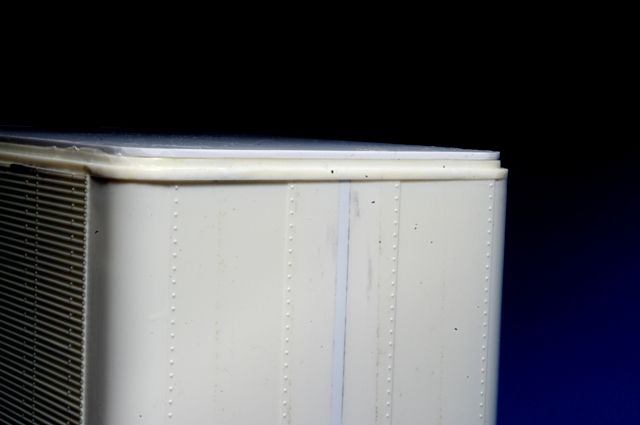 |
|
rnagle
CDL Student Driver
Posts: 564
|
Post by rnagle on Feb 14, 2014 20:41:27 GMT -5
One thing I have done differently from AMT's instructions is adding extra braces to the van body. As I will be building it with the doors "permanently closed" the bracing won't be visible and goes a long way toward keeping trailer sturdy. The locating pegs along sides don't fit all that well anyway.......  Sides also trimmed in height to replicate the 12' high beer trailers from back in the day. Braces are .060 styrene sheet, by making them as a pair of triangles they are easy to prefabricate and do not have to be the exact width of van body. All that is critical is the 90 degree square corner, I lay out and score with a try square for accuracy. After the sheet is snapped into a bunch of square pieces I score a line from corner to corner, ending up with 45 degree triangles. One side is installed and braced, then other side. Braces are cemented to sides and floor and also to each other where they overlap providing a good strong basic box:  |
|
Deleted
Deleted Member
Posts: 0
|
Post by Deleted on Feb 15, 2014 15:08:18 GMT -5
Great looking trailer.
|
|
|
|
Post by gatormarcstaug on Feb 15, 2014 21:45:31 GMT -5
Robert,
Very creative use of extra trailer kits and parts. I like the interior brace design you came up with!
Be Well
Gator
|
|
rnagle
CDL Student Driver
Posts: 564
|
Post by rnagle on Feb 22, 2014 19:57:49 GMT -5
Thanks Gator, at least one of them (Kingsway pup) is on it's "feet" now, kit suspension used with change to 5 spoke wheels with oil hub (resin parts by Plaskit) Roll up door fitted, edges of door opening trimmed with .010 x .250 styrene strip. 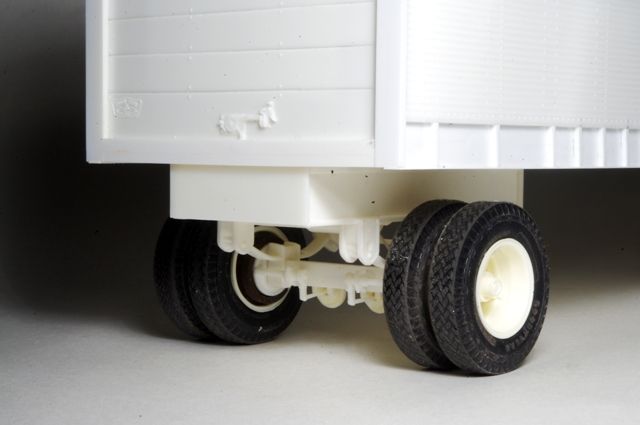 |
|
Deleted
Deleted Member
Posts: 0
|
Post by Deleted on Feb 22, 2014 20:05:05 GMT -5
Cool.
|
|
Deleted
Deleted Member
Posts: 0
|
Post by Deleted on Feb 23, 2014 7:06:55 GMT -5
Coming along very nicely Rob.
|
|
ewaskew
Local Delivery Truck Driver
Posts: 206
|
Post by ewaskew on Feb 23, 2014 21:07:01 GMT -5
That's looking real good Robert sure is good to be back on line again.
God Bless
|
|
rnagle
CDL Student Driver
Posts: 564
|
Post by rnagle on Mar 1, 2014 17:01:07 GMT -5
"Feet" at the other end of Kingsway pup, here scratchbuilding was a better approach. 3/16" square tube legs with 1/8" square strip inside. Braces are 1/16" styrene rod with ends flattened, crank handle is 3/64" brass rod. 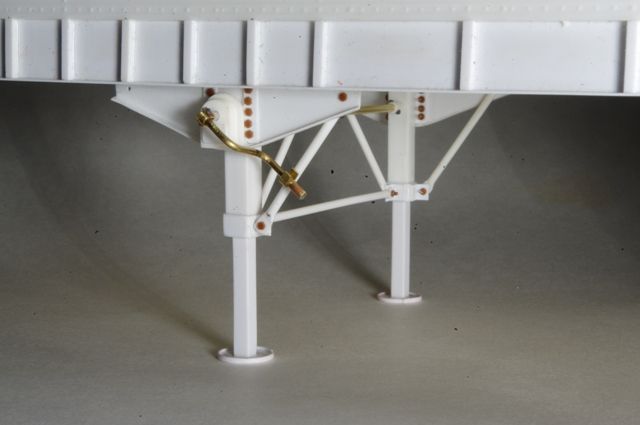 |
|
Deleted
Deleted Member
Posts: 0
|
Post by Deleted on Mar 1, 2014 17:31:25 GMT -5
Nice looking landing gear.
|
|
rnagle
CDL Student Driver
Posts: 564
|
Post by rnagle on Apr 10, 2014 18:39:49 GMT -5
Back to work on Kingsway pup after focusing on the General for past few weeks, spare tire carrier formed from Evergreen channel: 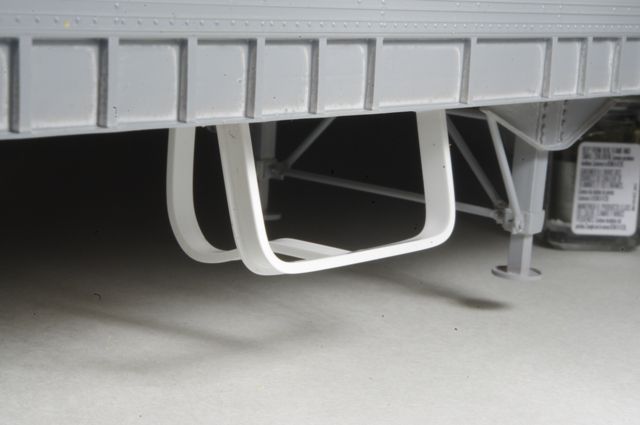 Rear step area built up using styrene strip & shapes. Mudflaps are a set from parts box, overscale thickness was corrected by wet sanding with 120 then 220 grit paper on a flat surface. Sounds like a lot of work but actually went fairly quickly. Flaps mounted to piece of Evergreen .100 styrene angle, nut/bolt/washer castings drilled & cemented in place. 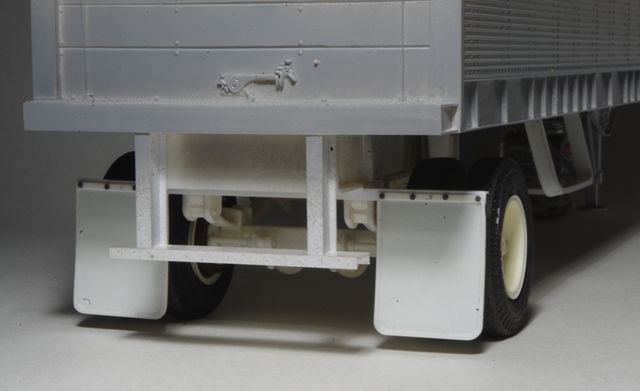 |
|
mart
Local Delivery Truck Driver
Posts: 346
|
Post by mart on Apr 11, 2014 6:18:30 GMT -5
Hi Robert! Great work! I like that pup trailer  Martin |
|
rnagle
CDL Student Driver
Posts: 564
|
Post by rnagle on Apr 12, 2014 16:46:40 GMT -5
Mart, thank you! The little pup trailer does have an appeal all its own, and it is still a project a lot of details can be added to. Brass strip worked best for the step and handles. Barely visible is .010 brass wire used for the two cables on roll up door. 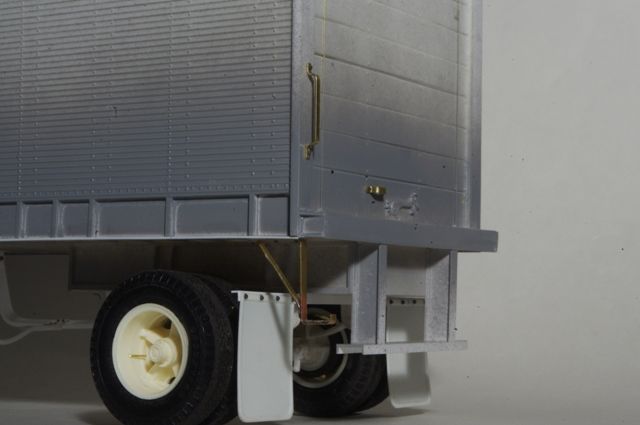 Evergreen .040 quarter round and .010 x .040 strip used to form contour along bottom edge of beaded side. Fastener detail added using Micro-Mark rivet decals for O scale (1/48) which are a good match for kit rivets. Brass shim used for patch plate on corner of trailer nose. 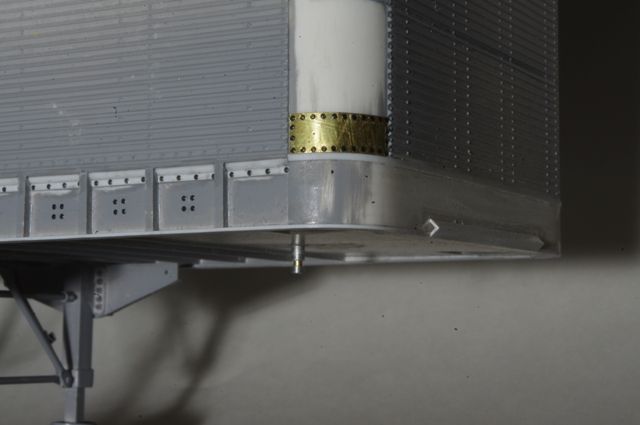 |
|


 Sides also trimmed in height to replicate the 12' high beer trailers from back in the day.