bandit1
CDL Student Driver
 
Posts: 732
|
Post by bandit1 on Nov 18, 2012 14:30:15 GMT -5
Im jealous!
|
|
Southgate
Local Delivery Truck Driver

Posts: 334
|
Post by Southgate on Dec 5, 2012 15:09:35 GMT -5
Since the last post, air cleaners were turned on the lathe and a couple details added. There are 2 air cleaners for the carrier truck. They'll probably go something like this:  PB292179 PB292179 by Southgate_08, on Flickr In progress: 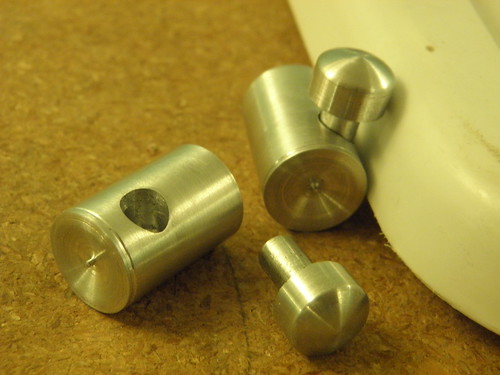 PB282155 PB282155 by Southgate_08, on Flickr up close and personal. That superglue has since been cleaned off.  PB292173 PB292173 by Southgate_08, on Flickr Then one mirror has been made, The harder of the 2, I like to think. It's all stainless where it's metal. Notice in this photo it's retracted toward the body... 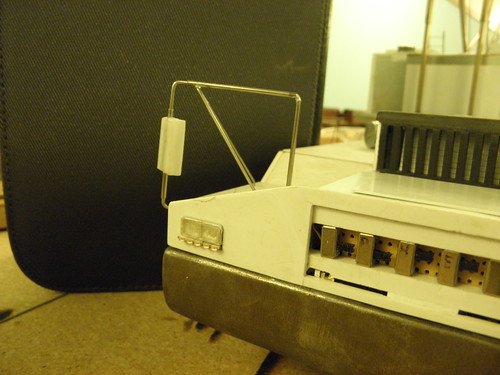 PB302182 PB302182 by Southgate_08, on Flickr It can be extended or retracted. Here, it's extended 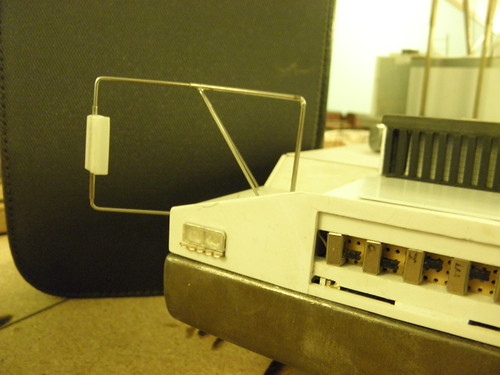 PB302183 PB302183 by Southgate_08, on Flickr Then, on to the cat walks. The idea here is that no matter how the upper unit is positioned, access to the cab can be made from the carrier's deck, either from behind, the front, or the gap in the rail. Not all cranes have these, but some do. 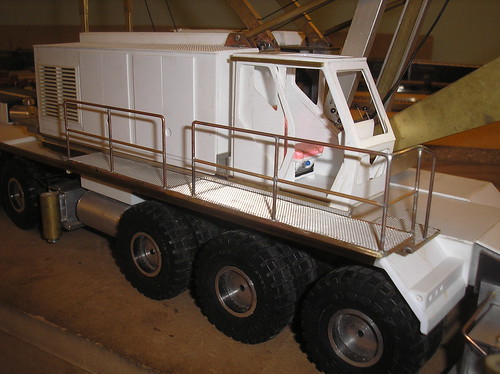 P1010092 P1010092 by Southgate_08, on Flickr 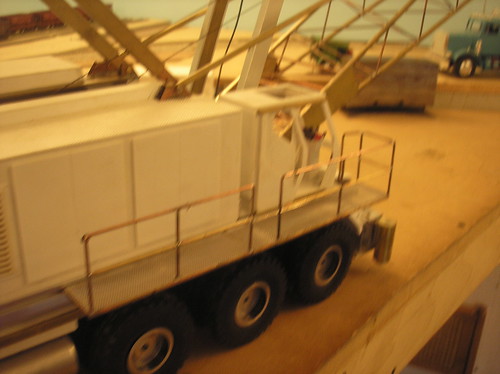 P1010093 P1010093 by Southgate_08, on Flickr They easily come off for transport. They slide in to that slot on the side of the upper unit from the front or back. You wouldn't believe how much trouble I had with these. First, building them was pretty easy. I thought I'd checked clearences on everything, but I had to go back and make some serious revisions. But it's all fine now with no interference on anything. 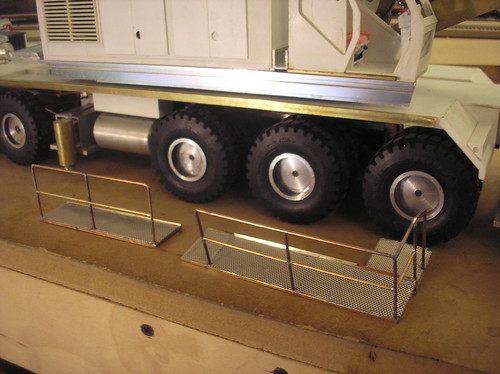 P1010094 P1010094 by Southgate_08, on Flickr 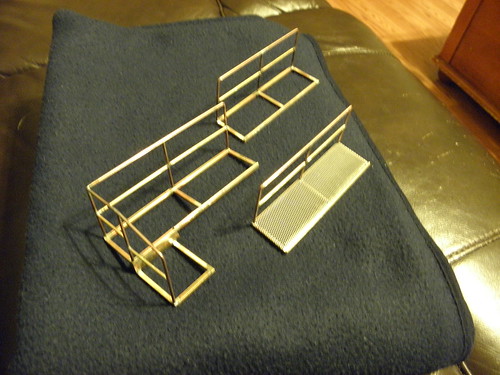 PC022191 PC022191 by Southgate_08, on Flickr Thanks for looking Dan |
|
|
|
Post by signature600 on Dec 18, 2012 20:54:03 GMT -5
WOW, there is some very nice engineering here, I like how you left the tag on the air cleaner to put the nut on, now that is forward thinking
Great fabrication work, look forward to more
|
|
Southgate
Local Delivery Truck Driver

Posts: 334
|
Post by Southgate on Jan 22, 2013 2:57:20 GMT -5
The last few weeks have been busy. I tried to spray the crane with rustoueum Marigold yellow with the spray can but had runs. (the can, not me). So that part dried for a week then I stripped it. Using the same can of paint, I loaded it's paint into a cup pand poured it into an airbrush. That worked much better    These are of the crane body mocked up. Since these pics were taken, the cabs and most of other body work have been painted. This gives an overall idea as to how it will look. Dan |
|
swamp rat
Local Delivery Truck Driver

Posts: 158
|
Post by swamp rat on Jan 22, 2013 12:34:38 GMT -5
WOW..that's a fine job u are doing...
|
|
alan
Local Delivery Truck Driver

Posts: 51
|
Post by alan on Mar 17, 2013 23:57:35 GMT -5
excelentttttttttttttttttttttttttttt
|
|
78kw
Local Delivery Truck Driver

Posts: 120
|
Post by 78kw on Mar 19, 2013 19:27:21 GMT -5
It's been a long time since I've peeked in on this one. Awesome work.
|
|
swamp rat
Local Delivery Truck Driver

Posts: 158
|
Post by swamp rat on Mar 19, 2013 19:59:36 GMT -5
wow thats just awesome..
|
|
Southgate
Local Delivery Truck Driver

Posts: 334
|
Post by Southgate on Mar 28, 2013 3:10:34 GMT -5
Here are the most recent pictures of the crane, taken a few minutes ago. I'm taking it to a show in Porland this weekend, so have been chipping away at it. there are a thousand things left to do, but each little thing shows now. Cabs are painted, and some of the interior details are too. Everything will get a dullcoat treatment so it doesn't look like a diecast!   I finally got some pictures of how the lights actually look.   The color of the tail and side lights is actually a bit richer than they appear here. Putting the colored lenses into the body over the LEDs makes the lights more visible over a wider viewing angle.  Exhaust pipes are lined up. The cab is removable, as is the carrier deck. the painted parts of the pipes remove with the cab. The white parts of the pipes stay on the carrier frame with the engine. They'll be painted too, of course  I may get a few other components painted by Saturday, but even so, it will be displayed on the "primer" table, along with some of it's transportation fleet. More on that later. Dan |
|
reddog414
Local Delivery Truck Driver

Posts: 131
|
Post by reddog414 on Mar 28, 2013 6:50:17 GMT -5
that's beautiful lot of hard work and skill there
|
|
pat
Local Delivery Truck Driver
 w/model kw 1982model i drove 2up between perth & kunnanura. 120tonne of prawns on board
Posts: 326
|
Post by pat on Mar 30, 2013 4:37:08 GMT -5
too much time on your hands. thats awesome.
|
|
mart
Local Delivery Truck Driver

Posts: 346
|
Post by mart on Mar 30, 2013 12:56:53 GMT -5
I don't wanna know, how many hours You spent on this crane. Its phantastic!  |
|
|
|
Post by cebugatormarc on Mar 30, 2013 18:14:29 GMT -5
Dan,
It looks like you have been pretty busy while I was away! The crane and carrier are looking very good.
Be Well
Gator
|
|
groundhog
Local Delivery Truck Driver

Posts: 287
|
Post by groundhog on Sept 30, 2013 15:04:47 GMT -5
man I wish I had your skills!!!! fantastic,awesome, super!!!! by far the best crane I've seen!!!! congrats on your build!!!! groundhog.
|
|
Southgate
Local Delivery Truck Driver

Posts: 334
|
Post by Southgate on Dec 3, 2016 1:35:11 GMT -5
Hi guys! I'm back, after taking some time off from the 1/24 (burnout)world and going into 1/87 for a while. But not without some sporadic progress on this project. Here are a list and a few random pix of some of the progress made since the last post: The rims were put back in the lathe and the edged contoured to look more real.  painted up and reinstalled  The outrigger boxes were closed up and detailed. Here's an in progress shot.    Outrigger pads were made,  And painted  The outrigger jack cylinders were painted yellow, but I don't have any pictures that recent. New radios were also bought, 2.4 Ghz to replace the static-ey old FM units, it runs like a whole new machine. I'll post more progress as pictures are loaded to photobucket. |
|

