|
|
Post by rwaldram on Nov 11, 2007 3:39:25 GMT -5
Ok, as usual, i'm sure this would've been covered in this forum at least once before but i cant find it. As I'm sure you all know, i have recently bought some Driven Front Axles from KFS that i had to modify and then reproduce. I have extended these parts to the correct measurements but i'm scratching my sunburnt head over how to cast these accurately, i hadnt even stopped to think about the fact that i have only ever moulded and cast single sided resin peices.
I have the Freemans DVD from ebay that shows how to do this but the catch is, i dont have the means to dig a tight fitting hole into a wooden base let alone the three different chemicals to seal the timber first...
I've been contemplating getting two plastic containers the same size (slightly angled out at the top) and sitting one inside the other, cut a hole in this top one to fit the parts and then pouring the silicone. once dry, remove the top container, filp the mould (and part) over inside the other container and repeat the process...
Failing that, i've also been thinking about suspending the two axles in one container and pouring the silicone around it to the centre line (ensuring the details underneith are coated),
Would either of these work?
|
|
|
|
Post by chevymaniac on Nov 11, 2007 16:29:30 GMT -5
You need to use acid free modeling clay or putty. Make your mould box with cardboard, or wood (if you use wood, you have to seal it) I use lego blocks. The box has to be 2 time wider and 3 times higher then your master. Fill half your box with putty and the gently push your master down to the depth you want. Take a pencil eraser and make a few indents in the clay and this will act as alignmemt key. Now you need to create your fill channel and vent channel. I sometimes don't bother with this step and use a sharp blade to cut the fill and vent channels along the split of the two mold halfs. Make sure the putty is tight against your master, I'll use a small flat carving knife sometimes to push the clay to the master is I see a little gap. Now pour your RTV to the top of your mould box and let it cure. When cured, flip your box over and remove the clay without disturbing your master. coat with rubber to rubber mold release and pour to the top of your box again and let it cure. That's it your done! Split your halfs and remove your master gently. Put your halfs together with elastic bands and pour your resin in the fill channel until it starts comming out of the vent channel. The hardest thing about making the two part molds is to figure out where to put the fill and vent channels. Hope this helps
Later
Dan
|
|
Rustycab
Local Delivery Truck Driver
 The one with the most toys - Die's too!
Posts: 379
|
Post by Rustycab on Nov 11, 2007 21:38:48 GMT -5
Here in the US we have some craft stores i.e. Michaels, Joann Fabrics They sell various size paper mache boxes that are very inexpensive I use these to pour my rubber molds. Very durable and reusable-- I can even mix my rubber and resin in these boxes and reuse them.The success of your casting depends very much on the thought and consideration you afford to your preperation prior to making your mold. For a two part mold you have to suspend the part insode the mold container and keep it stationary. I am posting a few pictures in my photobucket tonight and will post the link for you to see- Its easier to show you and explain .
Rustycab
|
|
Rustycab
Local Delivery Truck Driver
The one with the most toys - Die's too!
Posts: 379
|
Post by Rustycab on Nov 11, 2007 22:06:31 GMT -5
Here is a picture of the paper mache box 4" diameter 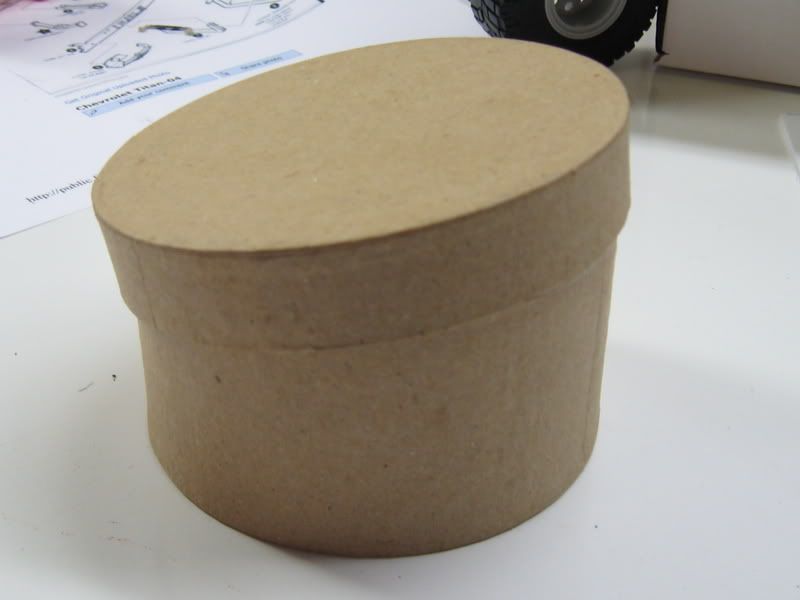 This picture show a tire I just finished (Heavey Hauler Tire Around 60 inches in scale) with a peice of sprue on the bottom. it will be mounted through the bottom of the container. 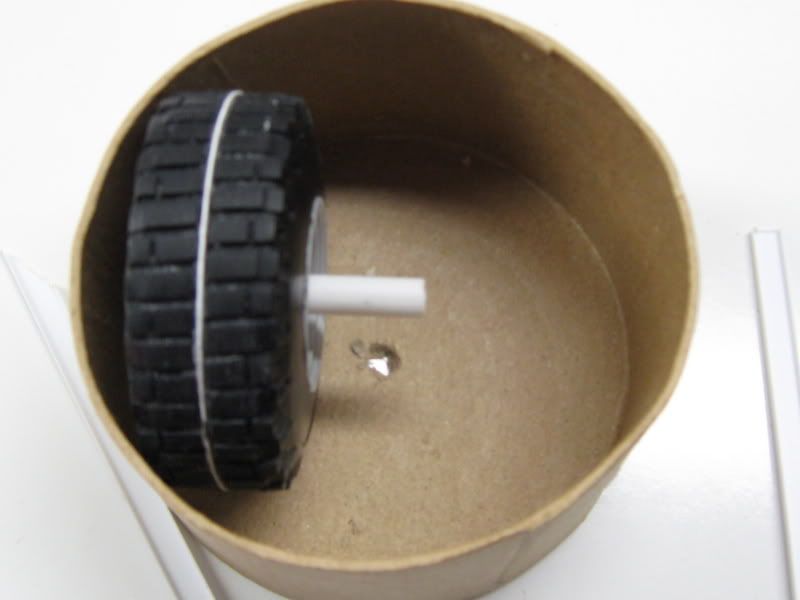 This will suspend the master in order to get all the detail. I glue the sprue in to keep it secure. Then I will pour the the liquid ruber (SMOOTH ON 50-50 mix Non Oderless) up to the white plastic seperator on the tire. Let it cure - As Dan indicated you need a pour hole and a vent hole as you will see in this picture 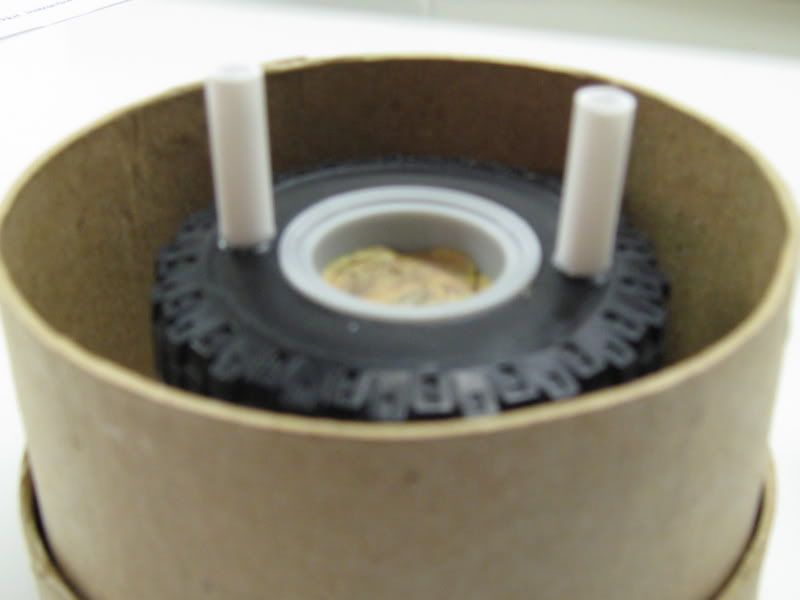 There is more- Let me know how much more you want to know This is what works for me Before you pour your second helping of rubber- you need to think about how you want to remove your master Takes some practice I am still working the bugs Not every Mold is the same Just my experiance |
|
|
|
Post by rwaldram on Nov 12, 2007 4:15:00 GMT -5
seeing as my youngest sibling has just turned 16 there was neither lego or plastacine in the house so i went out and bought a 'starter kit' of both. Here's the first two pics, one of the two diffs (identical) sitting in the 'soft stuff' with small tubes sitting in place for the pouring spouts and fine rod between them (horizontally & vertically) to act as vents.  And here again after the pouring the top half of the silicone, i'll keep posting progress pics but keep in mind, i'm expecting a few stuff up's first time around.  |
|
Rustycab
Local Delivery Truck Driver
The one with the most toys - Die's too!
Posts: 379
|
Post by Rustycab on Nov 12, 2007 7:14:18 GMT -5
Looks like you are on the right track
i would suggest making sure that your vent's come up to the top of the surface (looks like the right side of picture) That way when you are pouring it doesnt come out the side or the bottom. Consider replacing your rods with a bit bigger plastic tubing.
You want this go smooth and easy- Here is why!! What is the cure time on your casting medium? If yo have your resin mixed and have to wait for the small diameter rod are digest the resin you could end up wasting your resini by not getting in the void areas fast enough ( sharing this with you based on experiance) Make those rod area
s bigger You will use a little more resin but it wont be wasted by curing in the dish.
Another thing to consider as Dan mention Make your total mold bigger than the part you will need the mold to be self supporting after you remove the master.
There is a lot of stuff to think about when casting- Good Luck
|
|
Rustycab
Local Delivery Truck Driver
The one with the most toys - Die's too!
Posts: 379
|
Post by Rustycab on Nov 12, 2007 7:18:14 GMT -5
Another thought Check out Smooth-on.com They have a starter kit for under 50 bucks that takes away the need for clay and a bunch of other stuff- All you need is a container to pour you mold into and some mixing tools Very easy to use- no odor- Easy to clean up
The oomoo rubber is a great beginner material
|
|
|
|
Post by chevymaniac on Nov 12, 2007 18:10:29 GMT -5
I have to agree with Craig, You vents might be a bit small and the way you have them tied together you might have air lock the prevent proper venting. Hve a look at the picture 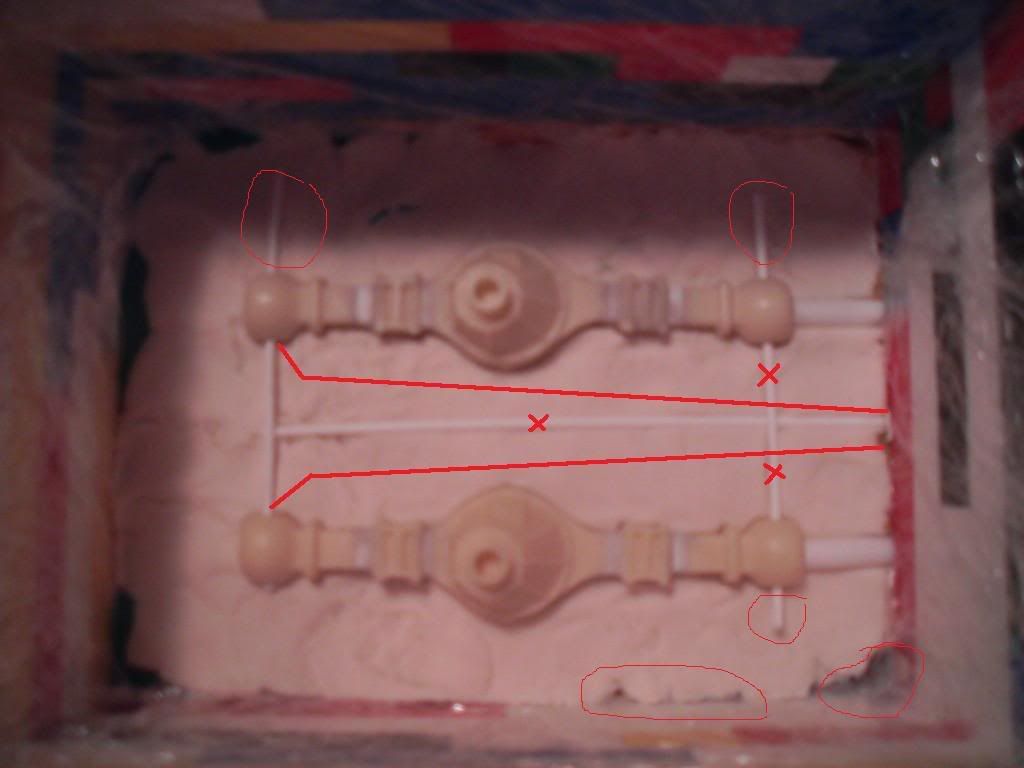 The circle area could be areas where air can't vent and depending on how much air gets trapped it might affect your casting. Also the X's represent area where you can get air locks...if some resin fill the vents at the top before the bottom is vented the lower vent will be blocked, it would be better to make 1 vent for each part like the red lines I drew on the pictures and also, you want to stay away from doing 90 degree corners when you vent because as Craig said, you are limiting your pour time. The area I circled around the perimeter of the mould box might be a problem, make sure you have a good coat of rubber to rubber mold release in these area because your two mold halves will stick to each other. Later Dan |
|
|
|
Post by rwaldram on Nov 12, 2007 19:15:48 GMT -5
Thanks again, i actually noticed these gaps around the edges prior to pouring the silicon and fixed them up (it's actually not as bad as it looked, i had a darker colour putty/clay underneith so it just looked like deep holes.
As for the vents, the two parrallel rods are actually running through the holes in the diffs (steering assembley would attatch to shortened versions of these)
Having said this, i have taken your advice on board and will keep it in mind if/when i have to re-do the mould's.
|
|
|
|
Post by rwaldram on Nov 13, 2007 1:22:20 GMT -5
OK, here's my first attempt... I was half way through mixing the silicone for the second half this morning when i was reminded i had an appointment in 15 minutes, so, in my haste i forgot to spray the first half with mould release (and i wasnt very happy as you can imagine) Despite this, i managed to trim the two sides apart and as can be seen, even got to use them. These are the two original (modified) diffs - still connected with the fine rod. The two new ones are on the left, they have a few small imprefections which was expected, but considering that this is my first atempt at double sided casting, i'm still pretty happy with it.  This is an example of u should always use mould release when making two part moulds....  |
|
|
|
Post by rwaldram on Nov 13, 2007 5:34:20 GMT -5
I'm having another attempt at these using the same moulds, i've opened up the pouring spout for both diffs and also i noticed that the last ones a cast had a bit of flex in them which will cause no end of problems with the weight of this machine so i've inserted a length of square brass tube into the moulds for this next cast for added strength, this runs the full length of the axle and will even be drilled through to take the steering components.
|
|
Rustycab
Local Delivery Truck Driver
The one with the most toys - Die's too!
Posts: 379
|
Post by Rustycab on Nov 13, 2007 7:14:47 GMT -5
Great effort keep us posted
|
|
|
|
Post by rwaldram on Nov 13, 2007 22:03:29 GMT -5
I had another attempt this morning, this time i sat the original small rods horizontally through the mould (see the first pic) this would hopefully prevent the need to drill through the resin to get the right holes for the steering and i also sat a length of brass through the axle (between the two bits of plascit rod) this would add strength and prevent flexing in the items when the full weight of the model is on them...
The good news is, the plastic rod pulled out cleanly leaving a perfect hole in the place it was meant to be and the brass (although close to the surfac) has added the much needed strength. They do still need a bit cleaning up (a little bit of filler here and there, and also i will need to clean up the recess for the drive shaft) but other than that, i'm quite pleased with the result.
I've added a pic of these to my original Demag Build thread.
|
|