Deleted
Deleted Member
Posts: 0
|
Post by Deleted on Sept 20, 2012 12:43:57 GMT -5
Looks really nice. Great detail.
|
|
41chevy
CDL Student Driver
 MY B-61
Posts: 743 
|
Post by 41chevy on Sept 25, 2012 12:19:50 GMT -5
looks almost real!! Paul
|
|
Tyson
Local Delivery Truck Driver
Posts: 81
|
Post by Tyson on Sept 28, 2012 0:06:03 GMT -5
|
|
Tyson
Local Delivery Truck Driver
Posts: 81
|
Post by Tyson on Oct 4, 2012 10:18:08 GMT -5
Batteries are pretty much done. 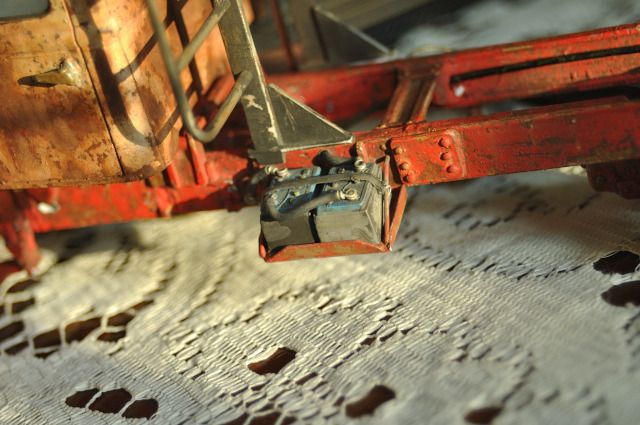 |
|
41chevy
CDL Student Driver
MY B-61
Posts: 743
|
Post by 41chevy on Oct 5, 2012 9:51:29 GMT -5
Batteries look great. What did you use for the cable ends? Paul
|
|
|
|
Post by brockway359 on Oct 6, 2012 20:47:39 GMT -5
Haven't checked this one in a while.I like the new fenders, they really add to the look the story suggests.
Steve
|
|
645gun
Local Delivery Truck Driver
Posts: 9
|
Post by 645gun on Oct 13, 2012 0:21:10 GMT -5
Great save,the rust is outstanding,
A good tip passed to me.I rebuild a lot of models and have the same issue with the glue/paint. A bud suggested an air eraser from Harbor Freight, in essense a mini sand blaster.. So being cheap I waited for a sale ($7.99 and supply of the fine grit). It's not real fast and can be messy(works best outdoors/garage etc), I did it over/in the trash can(gravity). WOW clean as a whistle. Worked really good on anything you want to take down to bare plastic without destroying it.
I do admit I'm a tool junkie and to being the laziest guy in town, so this is a cool cheap tool! The other half isn't too crazy about some the more noxious chemicals so this keeps that stuff out of the air/house etc.... Obviously eye & respiratory equiptment is recomended.
Hope this helps someone.....
Jake
|
|
|
|
Post by rumpelhardt on Oct 30, 2012 8:31:14 GMT -5
My Grandfather had construction equipment and had a bunch of old trucks out back for parts. As a kid I used to play in these trucks for hours.
The thing I remember most about that is the smell of the interior of those old trucks. While looking at this I could almost smell that odor again.
|
|
groundhog
Local Delivery Truck Driver
Posts: 287
|
Post by groundhog on Oct 1, 2013 13:37:54 GMT -5
awesome weathering,details!!!!!! fantastic build!!!! groundhog.
|
|
Tyson
Local Delivery Truck Driver
Posts: 81
|
Post by Tyson on Nov 28, 2013 8:02:25 GMT -5
Not much has happened to this thing in over a year, but I dusted it off today to give it some attention. 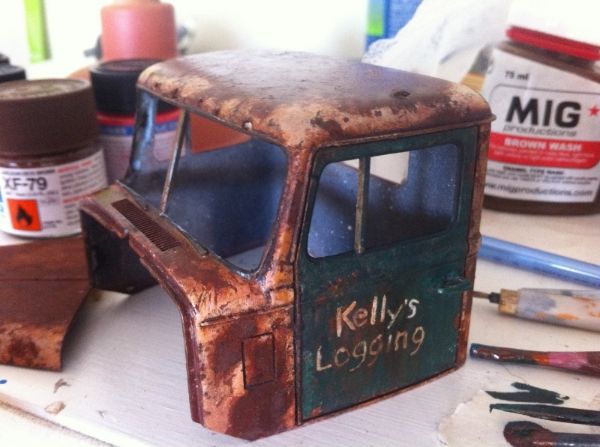 |
|
|
|
Post by gatormarcstaug on Nov 29, 2013 8:15:46 GMT -5
Tyson,
Glad to see that you are back to work on this one. I am really looking forward to seeing how you finish this one out.
Be Well
Gator
|
|
Tyson
Local Delivery Truck Driver
Posts: 81
|
Post by Tyson on Dec 16, 2013 9:50:28 GMT -5
I swear this build takes a new turn and heads in an almost completely different direction every time I sit down to it. Here's where it sits right now. 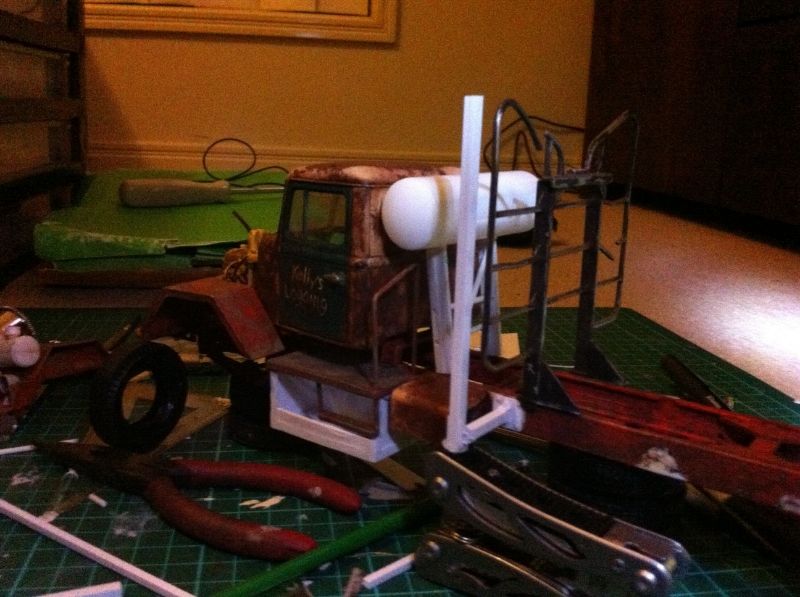 As you can see, I made a decision in regards to my walkways. I raised both of them so they're flush with the tops of the frame rails. On the driver's side I took a bit of inspiration from Muleskinner's Sterling and integrated a toolbox/catch all onto the underside of the walkway. For the passenger side I took the two air tanks I had hung one on top of the other and rotated them so they now sit side by side under the walkway. I previously had a standard Autocar fuel tank from the kit tacked on, but I was never really happy with it. Did a bit of spare parts diving, and came across the longer fuel tank from the Road Boss kit which was just the right length to fit the width of the cab nicely. Pretty sure it's not common practice for loggers, but I know back in the day some Kenworth's had "high mount fuel tanks." I built a rack for it, and tacked a step on the rail in the spot the old fuel tank was. With the fuel tank behind the cab I moved the kit cab guard back to make space. I then remember the old Howell and Sons tractor, and the old full cab guard they'd built for it. So, that big, unpainted L-shaped elbow hanging off the frame is the beginning of a cab guard along the lines of this:  With that said, whenever I finally get the chance I'll be adding the Mack 65k rears and 12x24s from AITM and a driven front axle from KFS. I'll also be rebuilding my stinger, because I'm not too satisfied with it either, and I want to add a bit more length to the frame. |
|