Deleted
Deleted Member
Posts: 0
|
Post by Deleted on Jan 27, 2013 21:32:53 GMT -5
Fantastic looking frame.
|
|
rnagle
CDL Student Driver

Posts: 564
|
Post by rnagle on Jan 28, 2013 21:14:07 GMT -5
Thanks Jim! Mudflap brackets finished up with strips .040 wide cut from .003 shim brass, soldered in place & left long: 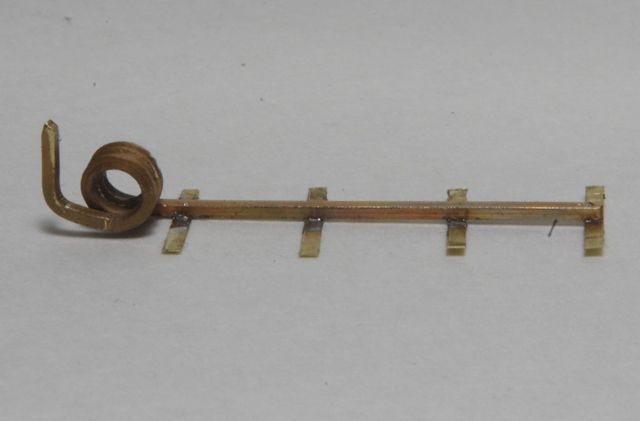 After bending around square bar they are trimmed to length & drilled .018" dia to mount (still to be built) mudflap. These were the easy pair to make, rear ones have 45 deg. angled ends.  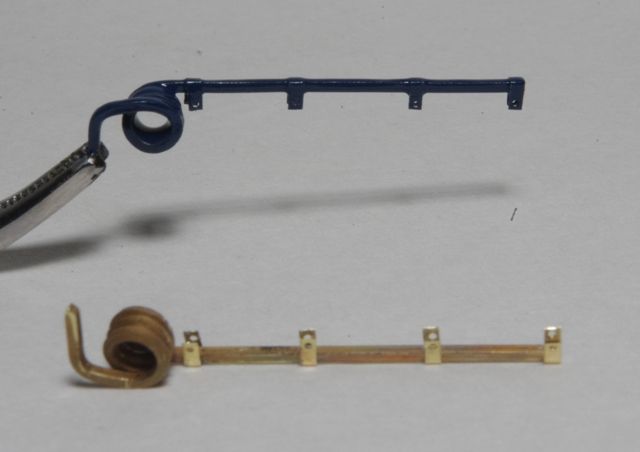 |
|
Deleted
Deleted Member
Posts: 0
|
Post by Deleted on Jan 28, 2013 22:11:59 GMT -5
True artistry!
|
|
rnagle
CDL Student Driver
Posts: 564
|
Post by rnagle on Jan 30, 2013 20:50:17 GMT -5
Thanks Jim! Just basic styrene work for mudflaps, .015 sheet with .015 x .060 strips, works out to within .002" of square bar hanger thickness. Guidelines lightly scribed .060" in from edge, this is more accurate than trying to draw them on with pencil. Inside corners made from .015 styrene and attached first, then outside strips. Easiest to cut flap itself to required size, leave everything else long and trim back after cement has cured. 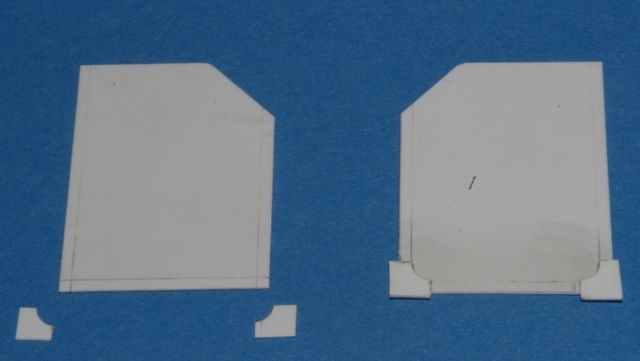 Rest of strips filled in then bottom corners cut & filed round. Still to be done is application of liquid surface primer at joints & sand smooth, cleaner job that way than using putty.  |
|
rnagle
CDL Student Driver
Posts: 564
|
Post by rnagle on Jan 31, 2013 20:52:33 GMT -5
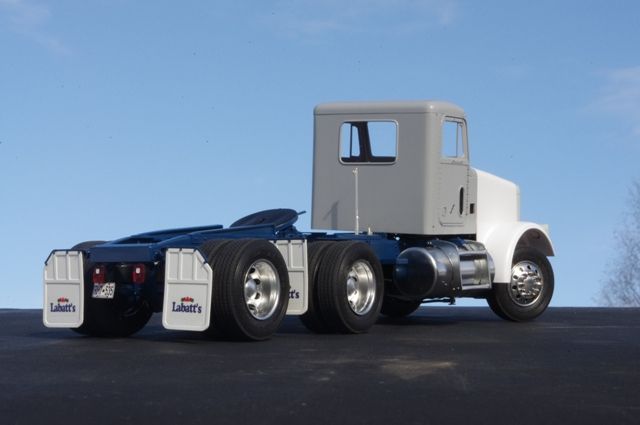
The mud flap saga continues! I of course had to pick what was likely the only truck in Labatt's fleet with 4 mudflaps out back! (Extra set between drive wheels added at driver's request) Tamiya liquid primer/surfacer applied to all joints & sanded smooth. Rouned corners at bottom were rough cut then filed/sanded smooth. 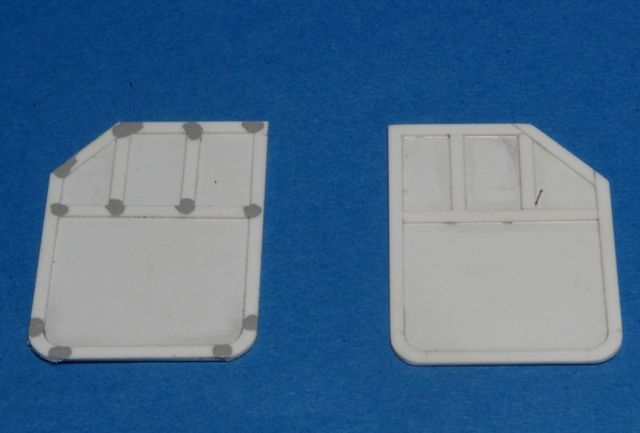 Painted white (white primer used here) then mounting holes drilled, .020 brass wire pins installed, left long then trimmed back after securing with a drop of adhesive. While a bit fiddly this seemed the best way to mount them as there is very little surface area for gluing. Decals still have to be made for Labatt's logo, will do that later when drawing rest of lettering as mudflap logo is just smaller version of door & trailer one. 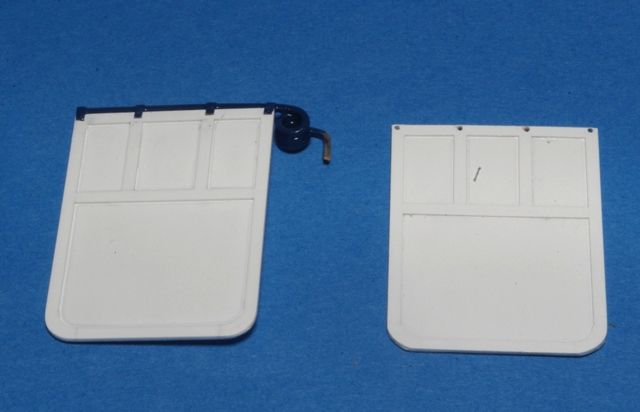 |
|
rnagle
CDL Student Driver
Posts: 564
|
Post by rnagle on Feb 3, 2013 12:11:36 GMT -5
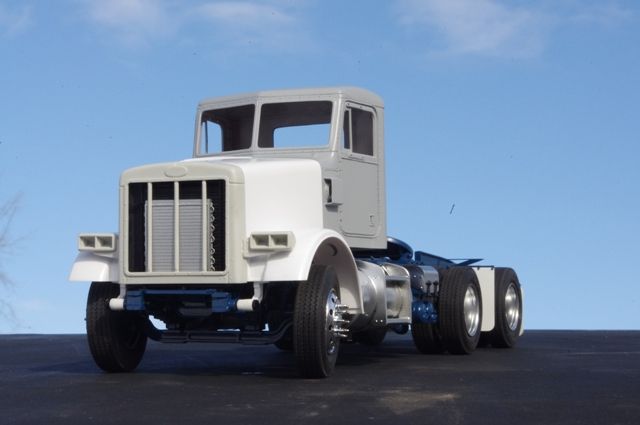
Frame on it's "feet" now, rad in place & engine being fitted. 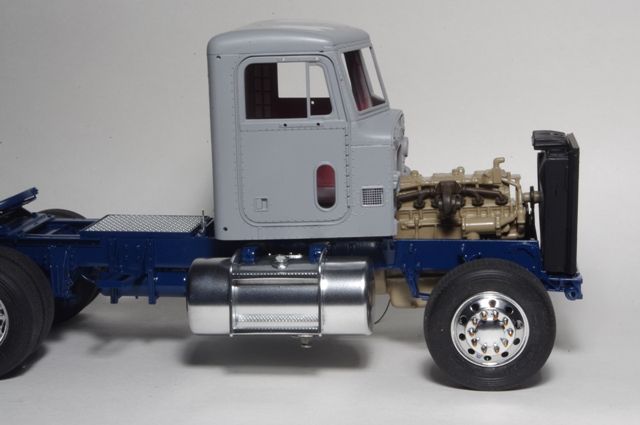 |
|
rnagle
CDL Student Driver
Posts: 564
|
Post by rnagle on Feb 8, 2013 19:19:42 GMT -5
At least one end of truck is now complete with mudflaps & taillights installed. Logos and licence plate drawn on CAD program, printed using Testors decal paper. Taillights are reworked Italeri housings with AMT lenses.  |
|
Chris Guthro
CDL Student Driver
If ya cant find'em grind'em
Posts: 807
|
Post by Chris Guthro on Feb 8, 2013 20:05:15 GMT -5
the detail of everything is amazing!!
|
|
|
|
Post by truckabilly on Feb 9, 2013 3:44:47 GMT -5
Nice and clean work. The changes in details are amazing and they make the model look very realistic.
Jarda
|
|
rnagle
CDL Student Driver
Posts: 564
|
Post by rnagle on Feb 10, 2013 14:39:26 GMT -5
Thanks guys! At other end, engine in place now. Some of the wiring, hoses etc will have to wait until cab installed before they can be fitted.  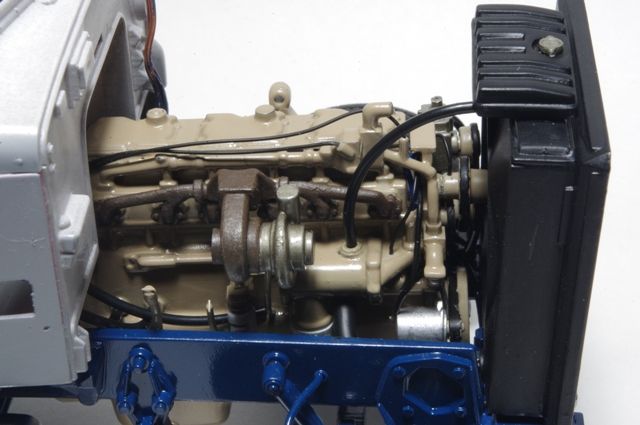 |
|
rnagle
CDL Student Driver
Posts: 564
|
Post by rnagle on Feb 13, 2013 18:47:05 GMT -5
Representation of a/c condenser made from 1/25 "snap" KW radiator section, styrene strip & copper wire. Grille & headlights de-chromed, test fitted. 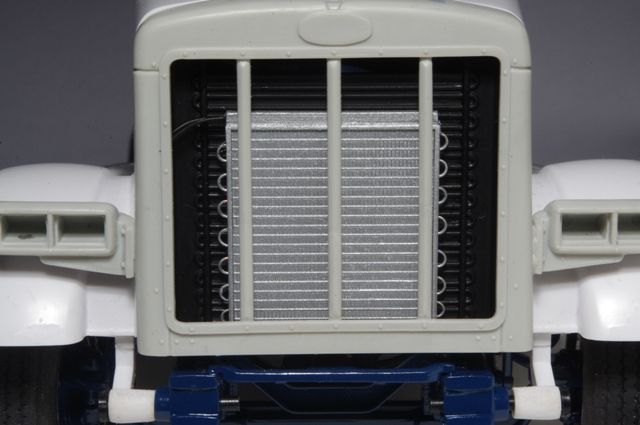 |
|
rnagle
CDL Student Driver
Posts: 564
|
Post by rnagle on Feb 15, 2013 21:06:02 GMT -5
Some cross-eyed madness this evening with fuel tank straps. Strips cut from .005" brass sheet, threaded portion of 00-90 screw soldered to .032" brass wire for T-shaped top attachment point. Brass strip folded over to fit wire, slotted with Dremel cutoff wheel then tinned & soldered to secure top attachment point. Once length determined .020 brass wire pin soldered to other end of strap and Bare Metal Foil applied. Threaded portion touched up with blue once installed. 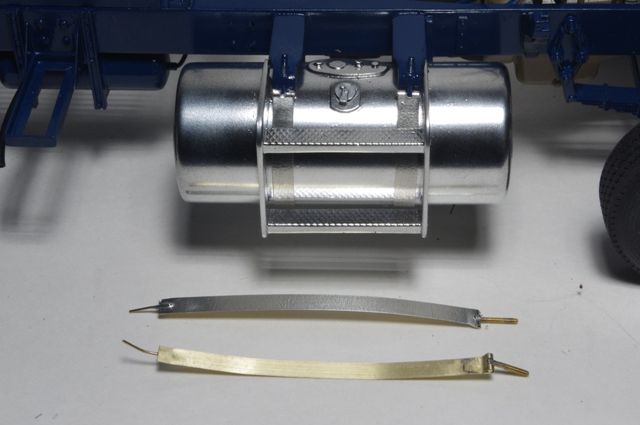 |
|
rnagle
CDL Student Driver
Posts: 564
|
Post by rnagle on Feb 16, 2013 11:20:46 GMT -5
|
|
rnagle
CDL Student Driver
Posts: 564
|
Post by rnagle on Feb 17, 2013 22:34:20 GMT -5
"Cross-eyed madness" continues with use of kit parts as guide for cutting .020 styrene strips attached to represent upholstery pattern on back wall. 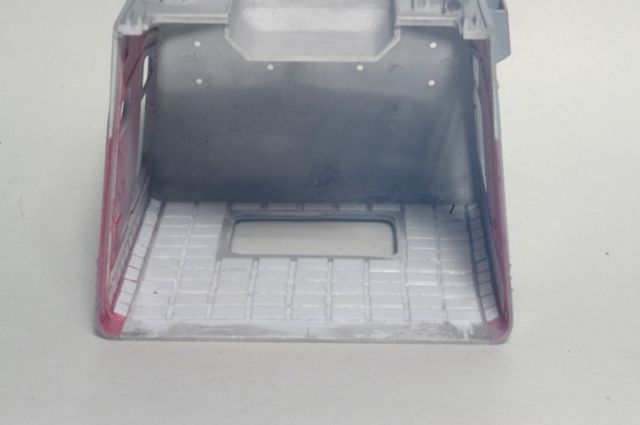 And kit exhaust pipe used for this section, bend adjusted slightly to fit different engine (Italeri's Peterbilt kit comes with Series 60 Detroit) and sanded smooth, flex pipe section represented with wrap of 32 gauge craft wire. Band clamps .005 shim brass (leftover sections of strip cut for fuel tank straps) with .020 x .040 styrene strip and model railroad detail parts for bolt heads. Pyrometer fitting is .010 styrene disk with 1/32" brass tube. 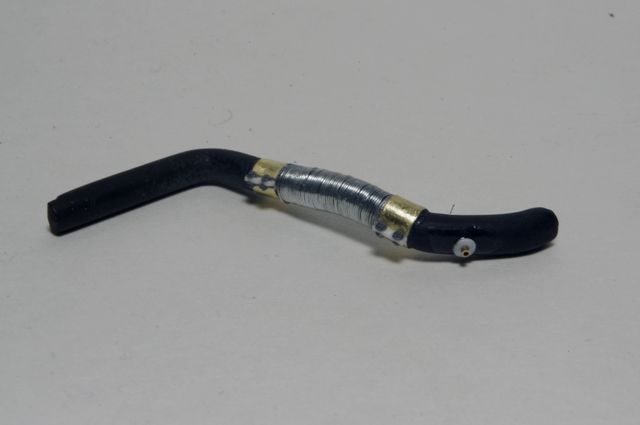 |
|
|
|
Post by truckabilly on Feb 18, 2013 2:24:47 GMT -5
The truck is shaping up nicely. I like the details you added to the build.
Jarda
|
|